Creating & Managing Alerts
________________________________________________________________________________________
CONTENTS
________________________________________________________________________________________
What are alerts?
Alerts are email messages that are sent whenever a new mission response matches specified criteria.
Create an alert
1. To create an alert, select the Alerts tab from the Mission Overview page. Next, select the Alert Builder tab.
-
If you don’t have any alerts (or filters) set up for a mission, then select Get Started. Otherwise, select the Add an Alert button.
2. Add an alert name. The name will be visible in the alert email that is sent to your specified recipients.
3. Add an optional custom message to the alert. The custom message will be visible in the body of the email that is sent to your specified recipients. The message can include up to 200 characters.
4. Add criteria that will trigger the email alert via the Select Criteria dropdown. You can create Criteria based on Place, Place Group, Task, Team, or User. You must add at least one criteria for the alert to be saved.
- Place: used to send an alert when mission responses are from a particular place, city, state, or postal code
- Place Group: used to send an alert when mission responses are submitted at any place within a selected Place Group
- Task: used to send an alert when mission responses contain a specific response to a particular task
- Team: used to send an alert when mission responses are submitted by any user on a specific team
- User: used to send an alert when mission responses are submitted by a specific user
Note: A Filter will be created when you save the alert. Read more about filters here.
Example: This example alert will be sent if mission responses are submitted in Denver OR Boulder.
5. Optional: To add additional Criteria, select the “Add Another” button. You can then choose whether the criteria should follow “And” or “Or” logic. You can add up to 5 rows of criteria.
- Selecting “And also” will send an alert when both criteria are met. Example: The city is Denver AND the user is Tom.
- Selecting “Or if” will send an alert when either criterion is met. Example: The city is Denver OR Boulder.
6. Click on the Save Alert button to save your alert. When a new mission response (an alert instance) comes in that meets your criteria, you will receive an email alert. You can now view any submitted mission responses that meet the criteria by selecting the associated filter from the Mission Overview page.
7. If you click Cancel, none of the criteria is saved in the system. You will not receive any email alerts based on that criteria and a filter will not be created either.
TIP: Email alerts will only send for any mission responses that come in after you save the alert. If you want to see whether any past mission responses would have triggered an email alert, you can use the associated filter. Once the alert is saved, navigate to the Mission Overview page and select the filter from the Filters dropdown. You can learn more about filters here.
Alert recipients
Adding recipients
You can add additional recipients to an alert by adding valid email addresses in the Additional Recipients box. When a Mission Response is submitted that triggers an alert, the alert email will be sent to all the emails listed.
Copy-paste or manually type emails into the Additional Recipients box. Multiple emails must be comma-separated.
If the recipient email belongs to a GoSpotCheck reviewer or admin user within your company, they will automatically be subscribed to the alert and receive an alert notification when they check the Alerts tab of the associated Mission.
The alerts will also appear in the GSC admin or reviewer's Subscribed Alerts.
Removing recipients
To remove an alert recipient, navigate to a Mission's alert builder tab. Click on the applicable alert and click the x next to the email you wish to remove.

The user will no longer receive email alerts. If the user is a GoSpotCheck admin or reviewer, the alert will be removed from their subscriptions and they will not receive any further alert notifications. If an alert was triggered prior to the email being removed, the alert will still display in the active/archive tab until they are viewed.
To exclude yourself from an alert, check the Remove me from recipients checkbox located above Additional Recipients.
Note: If an alert recipient is not a GoSpotCheck admin or reviewer, they will need to reach out to the user that created the alert to be removed as a recipient. You can locate the creator in the footer of any email alert.
Subscribed alerts
If you are a GoSpotCheck Admin or Reviewer User, you will see a Subscribed Alerts header after clicking on a Mission's Alerts tab. Subscribed alerts includes a mission-specific list of all alerts for which you will receive email and alert notifications.
If you no longer wish to receive an alert email for one of your subscribed alerts, you can remove yourself from it by selecting the trash can icon on the right-hand side.

If you did not create the alert and were added as a recipient by someone else, a confirmation popup will appear, asking to confirm your decision to unsubscribe from the alert. Click the Yes, unsubscribe me box to remove yourself from the alert.
Note: You cannot edit an alert that you did not create. Please contact the creator (listed in the alert email) with any questions or desired changes. Additionally, you can create a new alert that matches your desired criteria.
Use filters to create alerts
Alerts are email messages and app notifications that are sent whenever a new mission response matches filter criteria.
When you save a filter, you have the option add an alert. A pop up like the following appears:
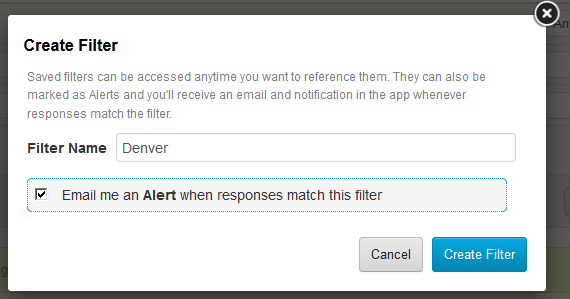
Once you’ve created an alert, you will receive an email whenever a mission response meets the criteria you've set; you will not receive alerts for mission responses completed before the filter and alert were created.
Alert email
The email alert itself contains a greeting, information about the response(s) that triggered the alert, a custom message (if specified), and a direct link to view the alerts. The subject of the email is the alert name.
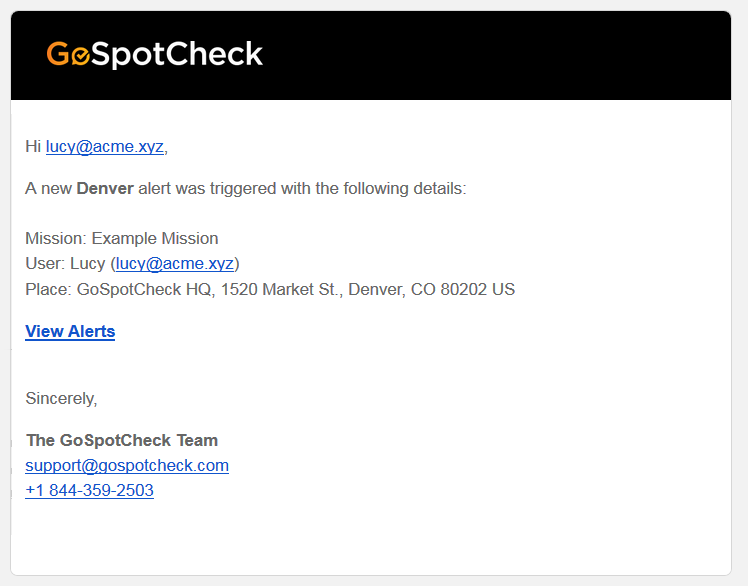
If the email recipient is a GoSpotcheck admin or reviewer with access to the alert's Mission, they will be able to click View Full Response and be taken to the mission response in the GSC web application. If the email recipient does not have access to the Mission or the GSC web application, they will still be able to view a read-only version of the full mission response that triggered the alert.
Reviewing Alerts
The email will direct you to the alerts page within the Mission. This page will display all other mission responses which have triggered alerts. From here, you can click on applicable mission responses or you can dismiss the alert by clicking the button on the right.
For a comprehensive list of mission responses that have triggered alerts across all of your missions, click Alerts in the drop down menu. From here, you can navigate to the new mission response by clicking it's name under the mission response column.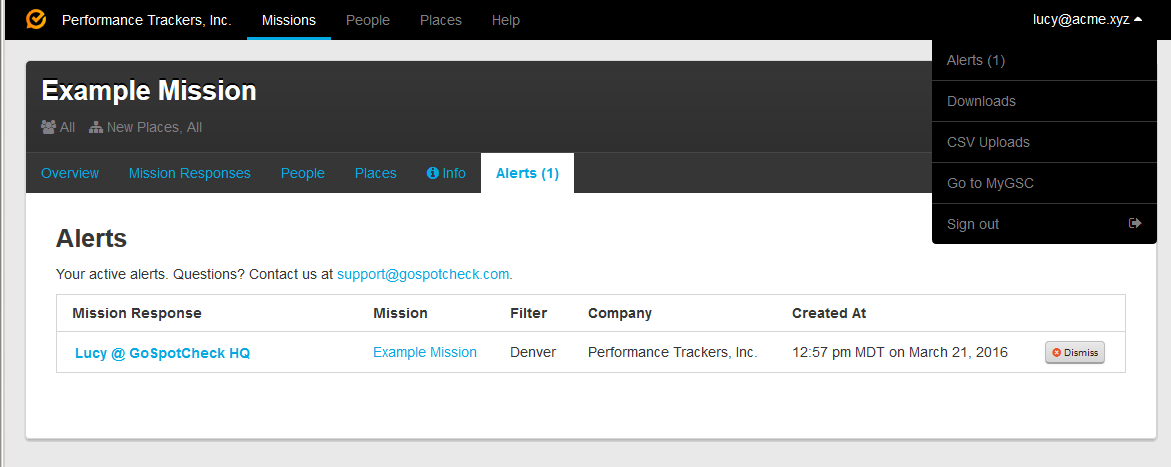
Managing Alerts
Updating alerts
To make changes to an existing alert:
- Navigate to the Alert Builder tab within a Mission.
- Click on the alert you want to edit.
- Make the changes you want.
- Click Save Alert. Any changes will go into effect immediately.
Note: When you update an alert the associated filter will also be updated.
Deleting alerts
To delete an existing alert:
- Navigate to the Alert Builder tab within a Mission.
-
Click on the trash can icon next to the alert you want to delete.
-
A choice will pop up. You can choose to delete only the alert and maintain the associated filter. Or you can choose to delete both.
- If you choose to delete only the alert, you will no longer receive any Alert Instances for that alert. You can still filter mission responses based on the criteria from the Mission Overview page. This change will go into effect immediately.
- If you choose to delete both, both the alert and filter will be deleted. You will no longer receive any emails and you won’t be able to filter mission responses. This change will go into effect immediately.